Flying Lead Changes: When to Introduce Them and How to Train Them
Here's a confession: I spent an embarrassing amount of time trying to teach flying changes before my horse was actually ready. Counterbending, swapping behind, cross-firing like a drunk crab. Sound familiar? Flying lead changes look effortless when a reining horse slides through a pattern or a jumper rolls through a course. But getting there takes patience, timing, and a horse who genuinely understands what you're asking.
What Exactly Is a Flying Lead Change?
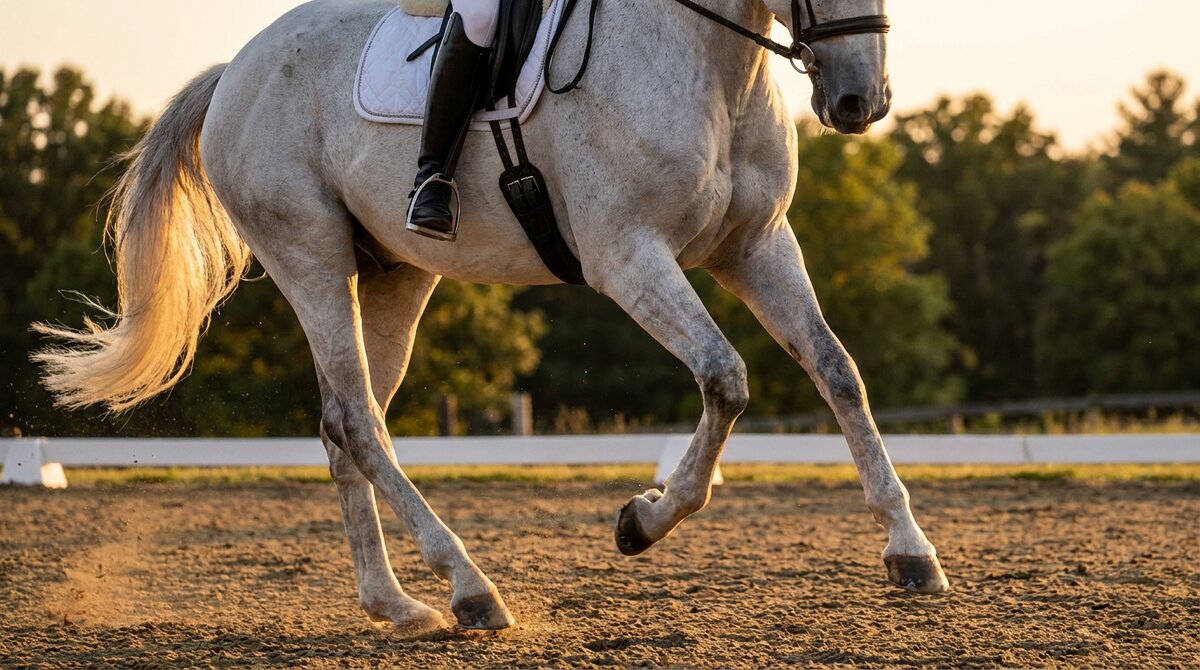
A flying lead change happens during the suspension phase of the canter. That brief moment when all four feet are off the ground? That's when the horse switches its leading legs, both front and hind, simultaneously. A clean change looks seamless. A late change, where the hind legs swap a stride after the front, looks and feels awkward.
The canter has a three-beat rhythm with a moment of suspension. During that suspension, the horse reorganizes which diagonal pair leads. It's athletic. It's coordinated. And it's something most horses can do naturally in the pasture when they're playing. The trick is getting them to do it on cue, balanced, and without turning it into a rodeo event.
When Is Your Horse Ready?
Not at three. Seriously, unless you're dealing with an exceptionally talented warmblood prospect with a trainer who does this for a living, three is too young. The horse's body is still developing, and the balance required for clean changes under a rider demands a certain level of physical maturity and strength.
Prerequisites That Actually Matter
Your horse needs to tick these boxes before you even think about flying changes:
Reliably picks up both leads from walk or halt. If you can't get the correct lead departure 9 times out of 10, you're not ready. Period.
Maintains a balanced, adjustable canter on both leads. Can you lengthen and shorten the stride without the horse falling on the forehand or breaking to trot? That balance is non-negotiable.
Performs smooth simple changes. Canter to walk to canter on the new lead, without rushing, without hollowing, without drama. Simple changes are the foundation.
Responds to lateral aids. Leg yields, shoulder-in, haunches-in at the walk and trot should be established. The horse needs to understand moving away from your leg independently of your rein aids.
Stays straight in the canter. A horse that swings its haunches in or drifts through turns will struggle with changes. Straightness first, always.
Most horses hit this checklist around age 5-6 with consistent training. Some naturals get there at 4. Some need until 7 or 8, and that's perfectly fine. The horse's timeline matters more than yours.
The Training Progression
There are several approaches. I'll outline the one that works for the widest range of horses and riders, keeping things systematic without being robotic about it.
Step 1: Perfect Your Simple Changes
This is where 80% of the work happens. Ride a figure eight at canter, performing a simple change through 3-5 walk steps at the center. Your goal: the horse stays round, balanced, and calm through every transition. No head tossing. No rushing. No falling on the forehand during the downward transition.
Gradually reduce the walk steps. Go from 5 to 3, then 3 to 2, then 2 to 1. When you can perform a simple change with a single walk step and the horse stays balanced and relaxed, you're getting close. This might take weeks. It might take months. Both are normal.
Step 2: Use the Counter-Canter
Counter-canter builds strength, balance, and body awareness. Start with shallow loops on the long side, maybe 3 meters off the rail, maintaining the "wrong" lead. Progress to full 20-meter circles in counter-canter. The horse should stay relaxed and balanced, not tense and rushed.
Why does this matter for changes? Because a horse that can comfortably hold a counter-canter understands lead commitment. It also builds the carrying power in the hind end that clean changes demand. Most trainers recommend 2-4 weeks of solid counter-canter work before introducing the actual change.
Step 3: Introduce the Change
Pick your approach. The two most common setups:
Diagonal line approach: Canter on the left lead across the diagonal. As you reach the opposite quarter line, apply your new outside leg (left leg slides back), shift your weight slightly to the new inside seat bone (right), and give a clear half-halt followed by the new aid. The change of direction naturally encourages the change of lead.
Figure-eight approach: Canter a figure eight. At the center, where you've been doing your simple changes, ask for the flying change instead. The horse already associates this spot with a lead change, so the pattern works in your favor.
Timing matters enormously. You want to apply your aids during the last beat of the canter stride before the suspension phase. That's when the horse's outside hind (which becomes the new inside hind) is about to push off. If you're late, you get a late change behind. If you're early, the horse gets confused.
Step 4: Reward Generously
The first clean change deserves a party. Walk, pat, maybe end the session right there. Early in the training, one good change per session is plenty. Two is a bonus. Don't drill it. Horses that get drilled on changes start anticipating and changing on their own, which creates a whole new set of problems.
Common Problems and Fixes
Late Behind
The front end changes but the hind end follows a stride later. This is the most common issue. Usually caused by the horse lacking engagement from behind or the rider's aids being too focused on the front end. Fix: go back to counter-canter and simple changes. Build more carrying power. When you re-introduce the change, focus your aid on the hind end by using a clear outside-leg-back cue.
Cross-Firing
Only one end changes and stays that way. The horse canters disunited. This often means the horse doesn't understand the full aid or lacks the strength to change both ends. Back to basics. More counter-canter, more simple changes, more lateral work to improve hind-end engagement.
Bucking or Kicking Out
Some horses express confusion or excitement by throwing in a buck during the change. If it's excitement, stay calm and keep riding forward. If it's confusion, your aids might be too strong or conflicting. Soften the ask. Make it clearer. And rule out physical discomfort, because back pain or saddle fit issues can absolutely cause this reaction.
Anticipating Changes
The horse starts swapping leads whenever it feels like it, especially at the center of a figure eight or near a corner. This happens when you've drilled too many changes in the same spot. Mix up your patterns. Canter straight lines. Do simple changes where you normally do flying changes. Keep the horse listening to your aids rather than guessing based on location.
ProblemLikely CauseFix
Late behindLack of hind-end engagement; rider aids too front-focusedReturn to counter-canter and simple changes; focus aid on hind endCross-firingHorse doesn't understand full aid or lacks strengthMore counter-canter, simple changes, and lateral workBucking / kicking outConfusion, over-strong aids, or physical discomfortSoften the ask; rule out back pain / saddle fit issuesAnticipating changesDrilled too many changes in the same locationVary patterns; do simple changes where you normally do flying changes
A Note on Rider Position
Your body matters more than you think. A crooked rider will never get consistently clean changes. Common rider errors include collapsing a hip, looking down at the change, throwing the upper body, and gripping with the knees. Film yourself. It's humbling but incredibly useful.
The change should come from your seat and legs, not your hands. If you're pulling on the reins to create the change, you're blocking the horse's ability to come through from behind. Think of your hands as staying quiet while your seat and legs do the talking. A half-halt to rebalance, then the new aids. Clean and simple.
Timeline Expectations
For an average horse with an average amateur rider working 4-5 days per week:
Weeks 1-4: Perfecting simple changes, building counter-canter
Weeks 5-8: Introducing flying changes, getting the first clean ones
Weeks 9-16: Building consistency, both directions
Months 4-6: Changes on straight lines, not just diagonals
Months 6-12: Sequence changes (every 4th stride, every 3rd, etc.)
TimeframeFocus
Weeks 1–4Perfecting simple changes, building counter-canterWeeks 5–8Introducing flying changes, getting first clean onesWeeks 9–16Building consistency in both directionsMonths 4–6Changes on straight lines, not just diagonalsMonths 6–12Sequence changes (every 4th stride, every 3rd, etc.)
Some horses take half this time. Others take twice as long. The horse that takes longer isn't less talented. It might just be more careful about understanding what you want. Thoroughness now prevents problems later.
When to Get Help
If you've never trained a flying change before, get a trainer involved. Seriously. Bad timing or confusing aids can create problems that take six months to fix. A good trainer on the ground can see timing issues you can't feel yet. Even two or three lessons focused specifically on changes can save you months of frustration.
If your horse is getting tense, resistant, or starts dreading canter work, stop and reassess. Flying changes should never become a source of anxiety for the horse. If they are, something in the training approach needs to change, not the horse.
Frequently Asked Questions
Can any horse learn flying lead changes?
Most sound, well-trained horses can learn basic flying changes. Some breeds and individuals pick them up faster due to natural balance and athleticism. Gaited horses that don't canter in a traditional three-beat gait are an obvious exception. Horses with hind-end lameness or significant conformational issues (like very straight hocks) may struggle. But for the average riding horse? Yes, with proper preparation and patience, it's achievable.
My horse changes fine to the right but not to the left. Why?
Almost every horse has a "harder" direction for changes, just like most people are right-handed. The stiffer side requires more preparation, more straightness work, and often a stronger half-halt before the aid. Don't just keep drilling the bad direction. Instead, improve the canter quality and lateral suppleness on that side at all gaits. The change will come once the foundation is stronger.
Should I use poles or cavaletti to help teach changes?
Some trainers use a single ground pole placed strategically to encourage the change. The idea is that the pole naturally shifts the horse's balance and encourages a swap. It can work, but it can also make some horses anxious or cause them to jump the pole dramatically. Use poles only under guidance from an experienced trainer who knows your horse.
How do I know if my horse is physically ready versus just being resistant?
If your horse can comfortably hold counter-canter for an entire 20-meter circle on both leads and perform smooth simple changes with one walk step, it's probably physically ready. Resistance at that point could be confusion (unclear aids), tension (too much pressure), or discomfort (check saddle fit, teeth, back, hocks). Rule out pain first. Always. Then evaluate your training approach before assuming the horse is being stubborn.
Do I need to train changes if I only trail ride?
Not really. For trail riding, a simple change through trot is perfectly adequate. Flying changes are most relevant for dressage (required at Third Level and above), jumping courses, reining patterns, and other competition work. That said, training changes is great for overall balance and communication with your horse. It's not a bad thing to teach even if you don't technically need it.
📝 Explore more in our Courses. Check it out here.
Sources
- United States Dressage Federation. "USDF Teaching Manual." usdf.org
- American Association of Equine Practitioners. "Lameness and Performance Issues." aaep.org
- Klimke, Ingrid. Cavalletti: For Dressage and Jumping. Trafalgar Square Books, 2019.
- University of Minnesota Extension. "Horse Training Principles." extension.umn.edu
Last reviewed: April 2026